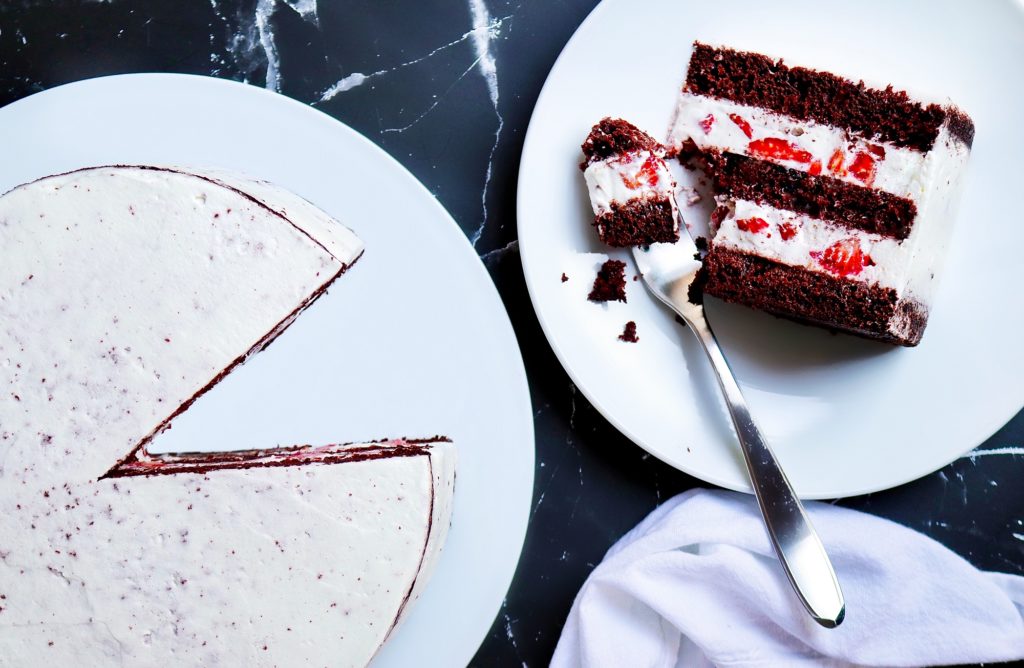
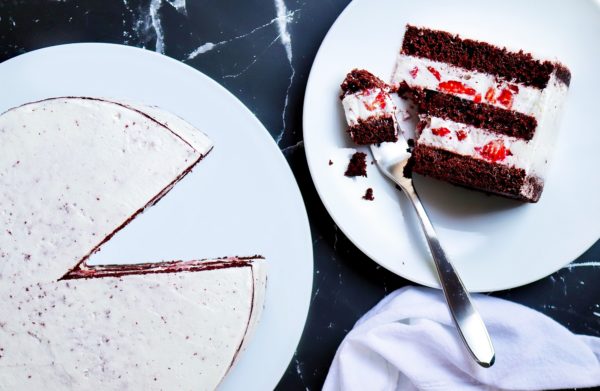
I love chocolate ANYTHING. If it’s got chocolate in it, on it, around it. . .anywhere near it, I want it! Those romantic occasions and moments of reward are almost always associated with the various and varied forms of this sweet treat. From truffles and dipped fruits to baked desserts, they’re the most memorable part of any meal. This cake is no exception. It’s one of the easiest, yet elegant, cakes to make; and it will impress the most discriminating palate.
CHEF’S NOTES
Don’t just stop at strawberries, try different types of seasonal fruits. Also, remember that fruit filled cakes have a shorter shelf life than others. So be sure to gobble it up within 3 days to avoid the dreaded spoiled-cake-sadness-syndrome. Don’t be afraid to flavor the whipped cream either. A simple addition of frozen puree or jams can work wonders.
| Prep Time | 15 mins |
| Cook Time | 30-40 mins |
| Passive Time | 30 mins |
| Servings |
9" Three Layer Cake
|
- 1 3/4 c Cake Flour, sifted
- 2 c Granulated Sugar
- 2 c Dark Cocoa Powder
- 2 tsp Baking Powder
- 1/2 tsp Baking Soda Optional for extra rise
- 1/4 tsp Salt
- 1 c Cooled Espresso or Strong Coffee We used our K-Cup
- 1 c Sour Cream or Buttermilk
- 1/2 c Oil
- 1 tsp Vanilla Extract
- 3 lrg Eggs We love Nellie's Free Range!
- 2 c Heavy Whipping Cream
- 1/2 c Milk
- 1 pkt Dream Whip
- 1 pnt Fresh Strawberries, cut into 1/4 pcs Sub any fruit you'd like
- 1/2 c Strawberry Jam Sub any fruit jam, puree, or paste
Ingredients
For the Chocolate Sour Cream Cake
For the frosting and filling
|

|
- Preheat oven to 350f degrees. Line two 9-10" round cake pans with baking spray and parchment. You can also line 2-quarter or 1-half baking sheet trays if you prefer to cut any desired shape layers.
- In a mixing bowl combine all dries and whisk together to blend. Combine all wet ingredients in the center and fold together until thoroughly incorporated. Make sure not to overmix. If using a stand mixer, use the paddle attachment and alternate combining wet and dries.
- Distribute evenly between pans. Bake for 30 mins and test for doneness. Add an additional 5-10 mins if center does not spring back.
- Remove from oven and allow to cool slightly. Once slightly warm to cool, wrap gently with plastic wrap. Reserve until ready to use. I make my cakes the night before assembly.
- In a stand mixer or using a hand mixer, combine the Dream Whip packet and 1/2 c of milk. Blend for 4 mins or until firm peaks form. Using a rubber spatula, transfer whip to another bowl. Using the same bowl but empty bowl, whip heavy cream until medium/firm peaks form. Add vanilla or other flavorings if desired, but not necessary. Transfer the Dream Whip to the bowl with the whipped cream and fold gently until completely incorporated. This will stabilize the whipping cream. Cover and refrigerate until ready to use.
- Wash, dry and cut your strawberries to the desired size. I cut them into small squares or quartered. Set aside.
- Remove cakes from the pan. Using a serrated knife or cake slicer, cut the layers into the desired thickness you prefer. I trimmed my cakes into three layers about 3/4 inch thick. If you prefer to thinner layers from the sheet tray method, use a cake board to cut the rounds for as many layers as you would like.
- Place the first layer of cake onto a flat plate or cake board. Spread 2 tbls of jam onto the layer.
- Fill a piping bag with enough whipped frosting to get a good grip. Cut the tip around 1/2 inch from the point. Pipe a double stacked ring 1/2 inch from the outer edge of the first layer. Pipe or spread one single layer of frosting. Place enough fruit on top to fill and spread another layer of frosting to fill in the gaps. Repeat this until you reach the final layer.
- After all layers have been filled, it's optional to frost the outside. I gave this cake a smooth crumb coat to give that "cookies'n'cream" effect. If you have plenty of whipped frosting left over, decorate as you would with any cake.
- Cover with a cake dome and allow the cake to rest in the fridge for at least 1-3 hrs before serving. Enjoy!

